Pages
▼
Tuesday, 31 August 2010
Buttermilk pancakes with elderberry and blackberry syrup
For the last couple of weeks the elderberry bushes have been teeming with fat, juicy berries - a perfect excuse to whip up something berryish.
These are classic american pancakes; thick and fluffy and delicious with butter and a slurp of this summery syrup. I find the flavour of elderberries alone a little too floral but they come into their own when combined with some tart blackberries and a squeeze of lemon.
I've heard of harvesting them using the tines of a fork, but I find it easier to gently remove them from the stems by rolling them between your fingertips until the fruit is released. It's important to carefully separate out stalk or leaves as both can be toxic.
Serves 4
5 medium eggs
1½ cups plain flour
1½ tsp baking powder
150ml buttermilk
50ml milk
a pinch of salt
for the sauce~
150g elderberries
150g blackberries
the juice of half a lemon
125ml water
200g sugar
1) To make the sauce: place all the sauce ingredients into a pan and bring to the boil, then reduce to a simmer and let it bubble for 10 minutes. Let it cool and little then pass through a sieve. Gently press the solids to release the juice but don't mash it through the sieve or the sauce will be cloudy.
2) Now the pancakes: sift together the flour, baking powder, and salt into a bowl, then separate the eggs, adding the yolks to the flour and the whites to a clean bowl. Stir the buttermilk and milk into the flour mixture so it forms a thickish batter.
3) Whisk the whites to stiff peaks, then add a third to the batter and fold in. When it's well combined, add the rest of the whites and fold through.
4) Place a large, heavy bottomed frying pan which has been lightly greased with vegetable oil onto a low/medium heat. Spoon 2 tablespoons of batter into the pan for each pancake, leaving plenty of room for them to spread. When the centre has large bubbles and the edges look a little dry (about 2 minutes), flip them and cook for a minute or so on the other side.
Serve warm with butter and the berry sauce. Irresistible, especially to wasps!
Sunday, 29 August 2010
Rosemary and nigella flatbreads
Something crisp to nibble on. Heady rosemary or nigella seeds can be added for interest and crunch, but the scattering of sea salt is obligatory.
250g plain flour
1 tsp baking powder
¾ tsp fine sea salt
120ml water
100ml olive oil
½ tsp nigella seeds or 1 tbsp finely chopped rosemary
For the topping ~
a pinch of flaky sea salt
either a pinch more nigella or a little extra rosemary
1) Sift the flour, baking powder, salt and the rosemary or nigella seeds into a bowl and make a well in the centre. Pour the oil and water into the well and stir in with a spoon until it comes together. When it has formed a ball, knead it gently between your hands a few times.
2) Divide the ball into 3 and roll each one out into a 25cm square onto a sheet of baking parchment. Brush a little more oil on top of each piece, then scatter with either the rosemary or nigella, and the extra salt. Score each square gently with a knife to create lines where it will snap once it has cooked. Try not to cut through the dough if possible.
3) Bake for 5 minutes at 425f/220c/gas mark 7 then reduce the heat to 375f/190c/gas mark 5 and bake for a further 8-10 minutes. The flatbreads are done when they are golden and crisp.
Saturday, 28 August 2010
Day 201
Aren't these just beautiful? They're part of Lisa Congdon's A Collection a Day project. It's a simple idea done well; photographing or drawing a collection every day and posting it for our gratification. The joy of her blog is the arranging and reordering of the objects, every day revealing new ways to view the same old jaded possessions. It appeals to the obsessive compulsive in me.
These vintage Yugoslavian enamel ladles from Day 201 caught my eye for their striking resemblance to an ill-practiced sychronised swimming team. Little red at the front is letting the side down.
Thursday, 26 August 2010
Remembrance of things past...
One of my strongest memories of being in Kyoto is of the taste of teriyaki. It has all the classic flavours of Japan - the rich umami of soy, sweet mirin and the sharpness and bite of fresh ginger. It may not be as elegant, but it beats a porcelain cup of lime flower tea and petite madeleine for me hands down.
I'm sure purists would be horrified by the addition of sesame oil, but this recipe is - like my rose tinted memories of Japan - my interpretation, so anything goes.
Soba noodles are made with buckwheat and sometimes yam flour, and have a more robust texture and pronounced wheaty flavour than egg noodles. If you buy them from the Japan Centre they come beautifully wrapped in brown chequered tissue paper in pre-portioned bundles. The Japanese have a preoccupation with gorgeous and immaculate packaging, which the recycler in me disapproves of, but the fluffy girl in me rather loves.
Teriyaki noodles and sesame crusted salmon
Serves 2
2 x 200g salmon fillets
150g soba noodles (or 2 pretty bundles)
4 spring onions, chopped and separated into white and green parts
3 pak choi
a bunch of chives, chopped
for the sauce~
4 tbsp light soy sauce (like Kikkoman)
1" piece of fresh ginger, finely grated
2 tbsp mirin
2 tbsp sugar
1 tsp saki
2 tsp sesame oil
1) Mix all the sauce ingredients except the sesame oil together in a small pan and bring to the boil, then lower the heat. Reduce the liquid until it is half the original volume.
2) Bring a large pan of water to the boil and add the soba noodles. Boil for about 6-8 minutes, then drain and set aside. They should still have a bit of bite, like good spaghetti.
3) Use a pastry brush to cover the salmon with the syrupy sauce, then grill for 2 minutes each side under a hot grill. Then brush a little more sauce over the top of each piece, sprinkle a tablespoon of sesame seeds over each fillet, then return to the grill for one minute to lightly toast the seeds.
4) Meanwhile, separate the pak choi into leaves, then briefly stir fry for a couple of minutes only. Set aside, then add the chopped white spring onion parts to the pan and stir fry for a minute before adding the remaining sauce, 3 tablespoons of water and the sesame oil to the pan. Stir in the drained noodles, and serve with the salmon and pak choi.
Wednesday, 25 August 2010
Ricotta and lemon stuffed chillies
The poor blameless chilli has a rather macho reputation, but these little nibbles are quite different. Despite their vibrant warning colour they only have a subtle kick.
Slow cooking mellows the heat but retains the flavour and gives the skin a melting, silky quality. Any lingering fires are extinguished by the cool, creamy ricotta and lemon filling. These are very moreish so be prepared to nibble a few while you're making them!
The grocers on Gerrard Street in London's China town are great if you want to buy a large amount of this type of chilli - they're sold by the kilo!
Feeds 4 as a drinks nibble
15 red chillies, about 10cm long
250g ricotta
the grated rind of 2 lemons
3 tbsp grated parmesan
salt
Oil for cooking(either light olive oil or vegetable oil)
1) Wearing rubber gloves, cut away the stalk end of each chilli, and scoop out the white pith and seeds then wash all the chillies to remove any lingering seeds. Take care when doing this as the chillies will give off rather pungent chilli fumes! Dry with kitchen paper.
2) Place the chillies in a single layer in a large pan, and fill the pan with enough oil to cover them. Turn the heat onto the lowest setting, so the chillies are very gently poached, and cook until the tip of a sharp knife easily pierces the skin (about 20 minutes). Allow the chillies to cool in the oil, then drain and set aside.
3) Cream the ricotta in a bowl with the lemon and parmesan until smooth, then lightly season the mixture – the parmesan is already pretty salty. Spoon the mixture into a piping bag with a large gauge nozzle (or, make your own piping bag and cut a 1cm diameter hole at the tip), and pipe the mixture into each chilli.
Sunday, 22 August 2010
A changeable pie
Essentially a left overs pie, this can be changed according to whatever happens to have caught your eye that week. I fell in love with the pretty stripy squash at Borough Market, and the goats cheese was left from a dinner I held on Friday night. Some thyme and rosemary from the garden give the whole thing an aromatic lift.
Makes one pie:
For the pastry ~
450g sifted plain flour
200g cold butter, cut into small dice
½ tsp salt
For the filling ~
400g of squash, diced into 1½cm pieces
100g spinach (weight after having juices squeezed out)
the kernals from one cooked corn-on-the-cob
1 medium onion
100g cooked peas
1 bulb garlic, broken into cloves but with the papery skin still on
2 eggs and 1 extra yoke, beaten
75g goats cheese, diced
75 cheddar, grated
1 tsp each of fresh thyme and rosemary, chopped
olive oil
salt and pepper
For the wash ~
1 egg, whisked
1) First make the pastry: rub the flour, salt and butter together between your fingers in a large mixing bowl until it resembles fine breadcrumbs. Add enough cold water to make a dough that only just holds together - try not to handle the pastry more than necessary or it will become tough. Chill for 30 minutes.
2) Chop the onion into thin wedges and place in a roasting tin with the squash, then drizzle over 1 tablespoon of oil and roast for 25 mins at 400f/200c/gas mark 6, then stir in the garlic and roast for another 10 minutes. Remove the garlic skins when they have cooled enough to handle.
3) Once cooled, place all the filling ingredients together in a large bowl and gently stir together. Season with salt and pepper, taste, and season again if necessary.
3) Divide the pastry into two pieces, one a little larger than the other. Take the larger piece and roll out to a 3mm thick circle. Grease and flour a 20cm loose bottomed tin, then line with the pastry, prick the base with a fork and leave to chill for 15 minutes. Line with baking parchement and fill with baking beans (or rice). Bake for 15 minutes then remove the beans and paper, brush with eggwash and bake for a further 10 minutes.
4) Trim any excess pastry from the edges of the pie and fill with the vegetable mixture. Brush some eggwash around the edges of the pie, then roll out the remaining pastry to 3mm and lay over the top. Push the edges firmly to the base to seal and cut a couple of slits to allow the steam to escape. Brush eggwash all over the top of the pie, then bake for 50 minutes at 350f/180c/gas mark 4, turning halfway through the cooking.
5) Once cooked, the pie should be golden brown - if not, pop it back in the oven for a further 5-10 minutes.
This is a sturdy pie so would travel well to a picnic, or more prosaically, to work for lunch.
Saturday, 21 August 2010
Garden windfall
..the unthinkable has happened.
After years of tomato mishaps, I have finally produced edible (ripe, juicy, delicious) tomatoes. It's nothing short of a miracle.
So far they have escaped the ever present threat of blight, though I am continuously checking for any tell-tales signs. The worst to happen to them is an annoyingly unweeble-like tendancy to fall over at the slightest trace of a breeze, with casualties scattered across the garden in a shower of red/green/amber each time.
These Gardeners Delights will nonetheless be welcomed into my kitchen, soon to meet an untimely end in a sauce or salad.
Monday, 16 August 2010
Warm pomegranate, quinoa and chick pea salad
A treasure trove for your lunchbox, full to bursting with ruby red pomegranate seeds and fresh herbs. I wanted to make something healthy for supper that would keep well as lunch for the next day - and this fit the bill exactly. The preserved lemon and pomegranate molasses give a blast of reviving sweet and sour to perk up that post-lunch lull...
Serves about 3 for supper or 2 with a bit left over for lunch:
100g white quinoa
1 can chick peas, drained and rinsed
200g shallots, peeled and halved
3 tbsp pomegranate molasses
3 tbsp olive oil
2 tbsp lemon juice
3 preserved lemons, skin-only, chopped finely
salt and pepper
a large bunch each of mint and parsley, roughly chopped
Seeds of 1 pomegranate
30g toasted flaked almonds
1) Take 1 tablespoon each of the oil and pomegranate molasses and toss the shallots in the sticky marinade then roast for 25 mins, turning occassionally, at 190c/375f/gas mark 5. 10 minutes before the end of cooking add the chick peas and turn them in the marinade to coat, and also add the almonds on a separate tray to toast in the oven.
2) Bring a pan of water to a brisk boil and add the quinoa. Boil furiously for 10-15 minutes until tender, then drain through a sieve.
3) Place the herbs, lemon, pomegranate seeds, almonds, shallots, chick peas, and quinoa into a large bowl. Whisk together the remaining olive oil, pomegranate molasses and lemon juice, and stir into the salad. Season with salt and pepper to taste.
Sunday, 15 August 2010
Pan fried squid with chilli and garlic
An everyday thing to eat that cooks in seconds. The chilli makes this a light and zingy supper to eat with a soothing bowl of pure brown rice and some steamed vegetables.
Serves 2
8 whole medium sized squid
the green parts of 5 spring onions, chopped
1 fat clove of garlic, finely chopped
1 deseeded mild red chilli, very finely sliced
salt and pepper
1) Wash and dry the squid and split down the 'seam' that runs down the length of the squid, then cut into large pieces. Score each piece lightly in a crisscross pattern to prevent them curling during cooking. Cut the top off the tentacles, and place all the prepared squid into a bowl.
2) Add the chilli and garlic to the squid and stir in a teaspoon of vegetable oil. Season well with salt and pepper.
3) Heat a heavy bottomed frying pan until smoking hot, then cook the squid, turning once, for just a minute or two. Stir through the spring onions and turn off the heat. Serve with rice and perhaps some steamed broccoli or mange tout.
Saturday, 14 August 2010
Hello sunshine
Thursday, 12 August 2010
Farm:shop
An oddity that I pass on my way to work; a derelict shop in Dalston that is being converted into an arts venue / indoor farm / restaurant venture.
They're promising a rooftop chicken coop and mushroom farm by next Spring, with every other available inch used to grow something, anything. I'm curious to know what a mini 'aquaponic' fish farm is..?
It's open for a nosy look-see until planting starts in September. Great if you need inspiration for your own urban jungle or for advice on how to breed trout in a windowbox.
http://farmlondon.weebly.com/index.html
Wednesday, 11 August 2010
Simple things
There's something very calming about making batches of gnocchi. All that repetitive plucking and rolling and dipping...this is not a recipe for someone in a hurry.
Having virtually no flour in this recipe gives a souffle-like gnocchi, completely unlike the little bullets from the supermarket. They only need a very simple tomato sauce to complement, not cover, their beauty.
Spinach and Ricotta gnocchi
Serves 4
750g ricotta
350g frozen spinach, weighed when thawed and drained
2 eggs
100g parmesan
25g plain flour
half a nutmeg, grated
salt and pepper
1) Whisk the ricotta with the parmesan, nutmeg and flour until smooth. Now really wring out all the liquid you can from the spinach, if it's too damp it will make the gnocchi fall apart when they cook. Finely chop the spinach and stir into the gnocchi. Season with a little salt and lots of black pepper, then chill for an hour.
2) Now fill a wide, shallow bowl with a thick layer of plain flour, then pluck off enough of the mixture to make a 1 inch ball, drop into the flour, then roll between your palms to make a ball. Repeat until all the mixture is used up, placing the gnocchi onto a lightly floured sheet of greaseproof paper.
3) Bring a large pot of water to the boil, then cook the gnocchi a dozen at a time until they rise to the surface, then leave to cook for another minute and remove with a slotted spoon. Have a warm bowl with a lid ready to keep the cooked ones warm until you have finished.
4) Serve with a simple tomato sauce and perhaps a little parmesan.
Tuesday, 10 August 2010
Please sir, can I have some more?
This was supposed to feed 4 or 5 as a starter, but it was too good. We each ate a modest, sensible portion. Then, as no one was looking, we ate the rest too.
Pea risotto with mint and nutmeg
Serves 3 greedy girls
200g arborio rice
160g frozen petit pois
1 litre of vegetable stock
1 small onion, very finely diced
about ⅓ of a whole nutmeg, grated
a few sprigs of mint
50g butter and a tsp of vegetable oil
half a glass of white wine
35g grated parmesan
1) Melt a tablespoon of the butter in a small pan and cook the peas for a few minutes. Add a ladle of the stock and cook for another 2 minutes, then use a hand blender to puree the peas, mint, parmesan and nutmeg, and set aside.
2) Heat the remaining butter and the oil in a large pan and gently fry the onion till soft and translucent. Add the rice and fry for a few minutes more. Add the wine.
3) Keep the stock on a gentle simmer on the adjacent hob on your stove, then add a ladle at a time, stirring often, until all the liquid has been absorbed. Then add another ladle, and so on, and so on. When the rice is soft but still has a little resistance in the centre, add the pea puree and serve.
Sunday, 8 August 2010
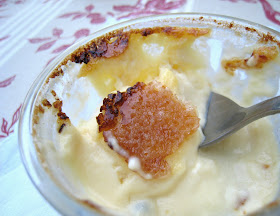
Passion fruit crème brulée
Today's simple brulée is the opposite of yesterday's meringue frippery.
No need for elaborate decoration here; the pleasure of this pudding is all in the contrast between the seductive crack of the caramel and the silken custard beneath. Adding a dash of passion fruit juice gives a subtle fruitiness that lightens the cream.
Serves 4
300ml double cream
230ml whole milk
½ tsp vanilla essence
the sieved juice of two large passionfruit
5 large egg yolks
50g caster sugar, and a little more for the top
1) Preheat the oven to 350f/180c/gas mark 4. Whisk the egg yolks and sugar in a large bowl for a minute until it has turned pale.
2) Pour the milk and cream into a pan and bring almost to the boil, then whisk gradually into the egg mixture. Stir in the passionfruit juice and vanilla. Skim any froth off the top.
3) Spoon the mixture into 4 ramekins, then place these in a deep roasting tin. Pour hot water into the tin to come an inch up the side of the ramekins, then bake for 35 minutes. When they are done they should still have a bit of wobble in the centre.
4) Remove the ramekins from the water and leave to cool, then chill in the fridge for at least a few hours.
5) An hour before serving, sprinkle a teaspoon of caster sugar evenly over the top of each brulée, then either use a blowtorch or a scorchingly hot grill to caramelise the tops.
Meringues for a wedding
...but not on the bride of course. She was radiant and far less conventional in a vintage 40's style dress, leaving these wedding pavlovas to add a touch of gaudy razmatazz to the wedding party instead.
This is an adaptation of a Nigella recipe in Feast. You can always rely on Nigella to give good pudding.
Her version calls for a topping of peach and passionfruit, but as I'm still a little in love with the blackberries in the garden, I indulged myself and piled strawberries, raspberries, blackberries and redcurrants onto a second pavlova. And that's the recipe I give here:
Serves 20
For the meringue ~
8 egg whites
a pinch of salt
475g caster sugar
4 tsp cornflower
2 tsp white wine vinegar
to top ~
150g strawberries
125g raspberries
150g blackberries
100g redcurrants
600ml double cream, whipped to soft peaks
1 dozen red roses
for the sauce ~
200g mixed fruits from above
30g sugar
2 tbsp grand marnier
1) Preheat the oven to 350f/ 180c / gas mark 4. Line a tray with greaseproof paper and trace a 10" circle in pencil.
2) Whisk the egg whites and salt in a large, scrupulously clean bowl until they form soft peaks, then gradually add the sugar a tablespoon at a time until you have a thick, glossy bowl of deliciousness. Try not to lick the spoon or your fingers. Oh go on then.
3) Sift over the cornflour, add the vinegar and gently fold in. Spoon onto the paper, staying within the circle, then smooth off the top and sides.
4) Place in the oven and turn down the heat to 300f / 150c / gas mark 2. Bake for 1½ hours then turn off the oven, open the door, and leave the meringue to cool completely.
5) Trim the rose stems down to 2", then dip in melted white chocolate and place on greaseproof paper to set in a cool place. Then half-dip the strawberries into the chocolate and leave to set.
6) Simmer the mixed fruits and sugar in a pan for 10 minutes, then pass through a sieve and add the liquer.
7) Once cooled, run a knife under the meringue to loosen it, then slide carefully onto a plate. Whip the cream to soft peaks and artfully arrange the fruit on top. I like to finish with redcurrants still on the stem, the roses and a drizzle of the luscious sauce.
Saturday, 7 August 2010
Spam spam, glorious spam
photo: Hackney Museum
Something from the archives ~
This was published in the post-war austerity years, when fresh eggs and unlimited sugar were still a pipe dream for most cooks. The canny housewife had to find alternatives to fresh cream, butter and so many other things we just take for granted. Seeing this made me feel rather lucky to have such a huge variety of food available in our wonderful metropolis!
Here's a recipe that could come in handy next time M&S runs out of organic free-range Jersey cream. It's not just cream, it's...
...Mock Cream
2 ozs. margarine
2 slightly rounded tablespoons cornflour, arrowroot, blancmange powder or custard powder OR
2 well rounded (not heaped) tablespoons flour
2 heaped tablespoons sugar, preferably castor
A few drops vanilla or other flavouring, if liked
½ pint milk
Blend the cornflour etc, with a little of the cold milk. Bring the rest of the milk to the boil and stir into the blended mixture. Return to the saucepan and cook for three minutes, stirring continuously. Pour into a basin and either cover prevent a skin forming, or press gently down on top of the mixture a round of greaseproof paper previously dipped in water. Leave until just cold, but not set. Beat the margarine and sugar until white. Add about a dessertspoon of the cold cornflour mixture to the creamed margarine and beat until light and creamy, so that the cornflour mixture is completely blended with the creamed margarine and sugar. Continue adding the cornflour mixture until all has been beaten in, then beat in the flavouring a drop at a time, tasting until the right degree is obtained.
Friday, 6 August 2010
Szechuan peppered aubergine with chinese mushrooms and cashews
Dried Chinese mushrooms are one of the ingredients that mystify most of my friends. I have to admit that they aren't immediately appealing; wrinkly and a bit dusty looking, they're not an easy sell. But they are worth persevering with.
They're great in a whole host of noodle soups and stir frys, adding a deep, meaty note with a hefty whack of umami. But however you have them, be sure to soak them first! Without this crucial first step they will remain tooth-breakingly woody and inedible even after cooking. Not nice.
If you don't have arrowroot you can substitute corn flour instead, but the sauce will be cloudy instead of clear. To make this dish vegetarian, just leave out the oyster sauce.
Serves 2
1 cup basmati rice
1 medium aubergine, cut into 1 inch cubes
8 or so spring onions
1 clove garlic, finely chopped
a piece of ginger the size of a 50p piece, finely chopped
a couple of handfuls of dried mushrooms
80g raw unsalted cashew nuts
1 tsp ground szechuan pepper
½ tsp ground black
½ tsp salt
for the sauce ~
3 tsp ground arrowroot
1 tbsp oyster sauce
2 tsp soy sauce
1) An hour or two before you plan to start cooking, soak the mushrooms in 2 cups of water. Better still, do it the night before.
2) Steam the aubergine for 5 minutes, then set aside. Meanwhile, wash the rice in a saucepan then add 2½ cups of water, bring to the boil, then turn down to the lowest flame and leave until cooked (about 10 minutes).
3) Finely slice the green parts of the spring onion, and chop the white ends into 2-3 inch batons.
4) Remove the mushrooms from the water, but do not throw away the soaking liquid - this is used in the sauce later. Cut the stalks from the mushrooms and discard. If the mushrooms are larger than bite sized, chop them in half.
5) Mix the sauce ingredients together with half of the soaking water.
6) Now fry the cashews over a low/medium heat with a little vegetable oil until golden brown. Remove from the frying pan and drain on kitchen paper.
7) Turn the heat up and add the white spring onion, fry for a minute, then add the mushrooms, aubergines and mushrooms. Fry for a further 3 minutes, turning frequently, then add the garlic, ginger, peppers and salt and fry for a minute more.
8) Add the sauce, stirring as you do. The sauce will probably be too thick; if so, add more of the mushroom water. Take care to avoid any grit at the bottom of the bowl. Cook for another 2 minutes, stir in the cashews and add the green spring onions. Fluff up the rice with a fork and serve.
Wednesday, 4 August 2010
Blackberry and lavender cake
Is the summer over already?
The garden has been wet and windy, and as we wait for the second crop of lettuce to emerge and the tomatoes to ripen it's all looking a bit barren... Apart from the entirely unintentional harvest of blackberries that is! The bushes are groaning with the dark little berries, beckoning me to make some sort of cake perhaps..?
A recipe for a very seasonal cake: garden berries baked with lavender brought this week by my lovely mum from her garden in Sussex. The crumble topping gives a nice textural contrast and the berry cream makes it all look terribly flash with minimum effort.
For the cake:
150g room temperature butter
200g golden caster sugar
3 medium eggs and 2 egg yolks
150g self raising flour
1/2 tsp baking powder
30g ground almonds
1 tsp dried lavender, crushed
200g blackberries
For the crumble topping:
50g cold butter, cut into small cubes
50g demerara sugar
100g plain flour
50g blanched hazelnuts, roughly chopped
and to top ~
150ml double cream
100g blackberries
1 tbsp sugar
1) First make the cake: whisk the butter and sugar until pale and creamy then add the eggs one by one. Gently fold in the dry ingredients and then finally stir in the blackberries.
2) Grease and line a 25cm springform cake tin and pour in the cake mixture. Preheat the oven to 180c/350f/gas mark 4.
3) Now make the crumble topping by placing all the ingredients into a bowl and gently rubbing between your fingertips until the butter is evenly distributed. Scatter over the top of the cake, then bake for 50 mins-1 hour, or until the top is golden and a skewer poked in the middle comes out clean.
4) To make the berry cream, gently poach the blackberries and sugar with a tablespoon of water for 5 mins, then push through a sieve. When cold, stir into gently whipped cream, and serve with the warm or cold cake.
Tuesday, 3 August 2010
Violets for Violet
Our very own Violet is getting married and today we picnicked to toast the bride. The star of the show was this incredible chocolate mousse cake from Bea's of Bloomsbury. An extraordinary confection of dark truffle cake layered with chocolate mousse and fresh raspberries, it was utterly delicious. And vegan! And of course topped with Violet's namesake.
Sunday, 1 August 2010
Prawn and soya noodle soup with baby gem lettuce
The lettuce is added just before the end of cooking so it retains some crunch, while the leaves soak up the Japanese style broth in a rather delicious way.
If you're not inclined to make dashi, you can either buy it ready made or substitute vegetable stock instead.
Serves 2
50g medium thickness flat rice noodles
5 cups dashi stock
a dozen raw prawns
1 head of baby gem lettuce, washed and torn in two
a handful of soya beans
1 spring onion, finely chopped
1/2 tsp sesame oil
1 tsp soy sauce
sprinkling of bonito flakes (optional)
1) Bring the dashi to the boil, then add the noodles, prawns, and soya beans. Cook for one minute then add the lettuce and soya sauce.
2) Cook for a further 2 minutes then take off the heat. Serve immediately in deep bowls. Add a few drops of sesame oil to each bowl, and sprinkle over a little bonito and the spring onion.
Chocolate and hazelnut meringue cookies
These are my new favourite cookie - very light and moreish but with a proper chocolate kick. They're also an excellent wheat-free biscuit for any coeliacs out there. This is an adapted version of a recipe for Beacon Hill cookies, which usually contain walnuts. I've swapped them out for mellow hazelnuts and creamy chunks of white chocolate.
These are A M A Z I N G while they're still warm!
CHOCOLATE AND HAZELNUT MERINGUE COOKIES
Makes 20 cookies
Makes 20 cookies
205g dark 70% cocoa chocolate
3 large egg whites
⅓ tsp cream of tartar
150g caster sugar
100g blanched hazelnuts
¾ tsp vanilla extract
125g white chocolate, chopped into rough chunks
1) Melt the chocolate over a bain marie, then allow to cool a little.
2) Whisk the egg whites and cream of tartar until it reaches soft peaks, then gradually whisk in the sugar, a couple of spoons at a time, until shiny and thick. This will take a few minutes but it does need to be thoroughly mixed in.
3) Gently fold in the melted chocolate, hazelnuts, white chocolate and vanilla, trying not to knock out too much air as you do. A few streaks of white meringue won't matter.
4) Preheat the oven to 350f/180c/gas mark 4
5) Line 3 baking sheets with greaseproof paper then drop large tablespoons onto the tray, and flatten slightly with the back of the spoon. They will spread a little so leave a centimetre or so around the edge of each
6) Bake for 15 minutes - if you don't have a fan assisted oven, turn them 180° halfway through cooking. Leave to cool for 15 minutes before using a palette knife to transfer them to a on a wire rack.